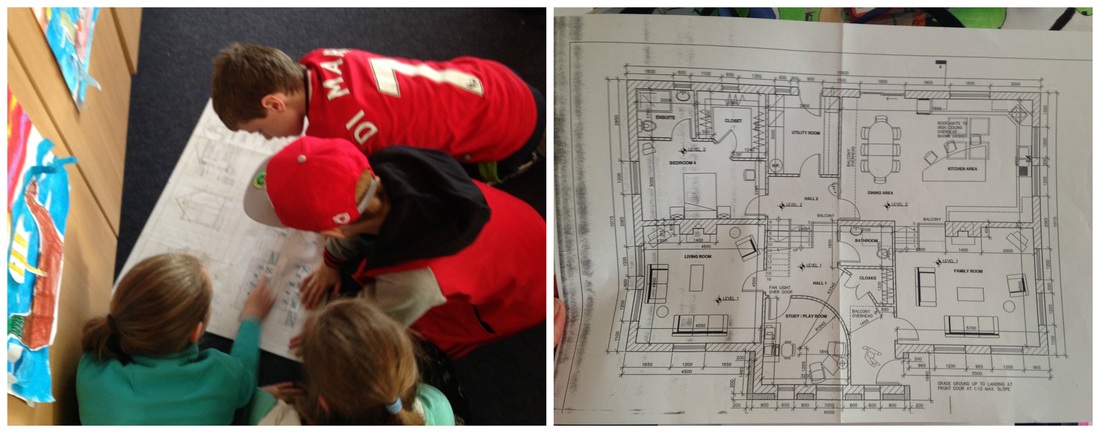
We recently learned about homes and houses in history. We created a timeline to trace the history of homes where humans have lived for many years, starting from caves right up to modern houses and ghost estates, which remain as a legacy of the recession in Ireland. We also talked about Georgian houses, which remain very popular today and can be seen in several cities in Ireland. Ross told us about his Dad's work as an architect designing houses, and Ella brought in some house drawings her Dad (an engineer) had worked on. It was very interesting to see the detail and measurements on the plans. 
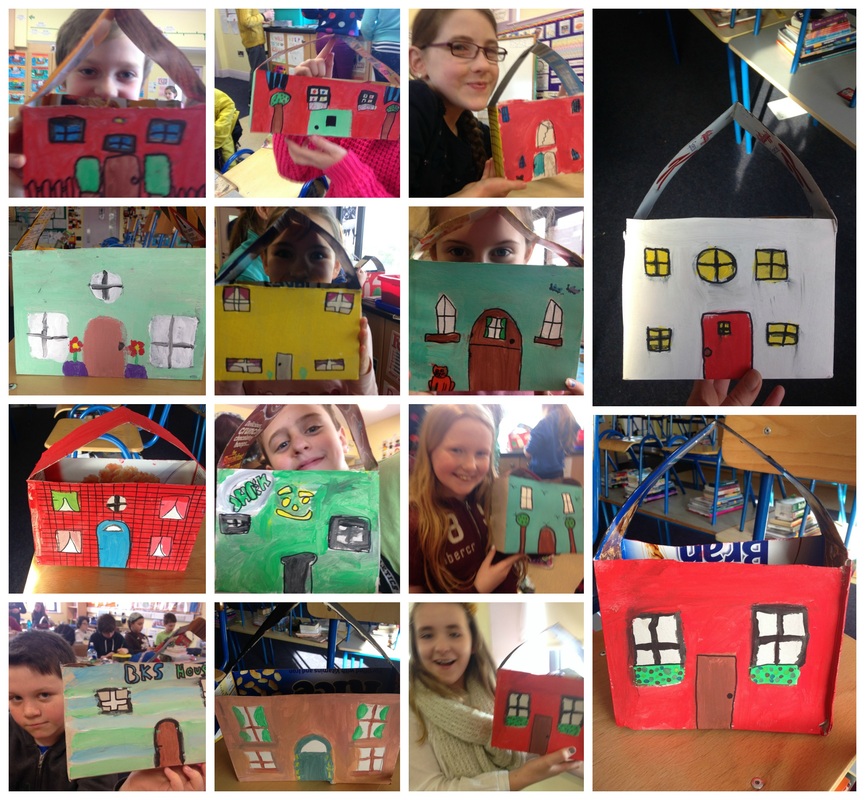
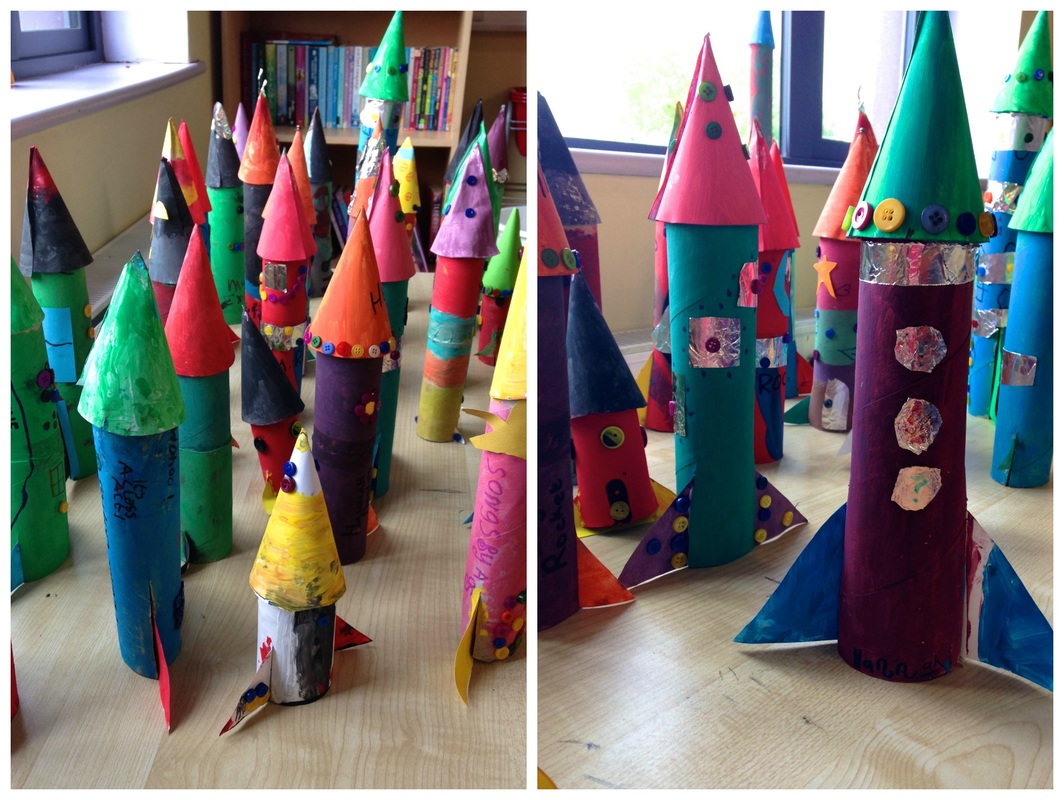
In Art, we also created houses using cereal boxes. We had to cut, score and fold the cardboard to turn the box inside-out and change it into a house! We then painted the houses and added detail with permanent marker. What do you think? 
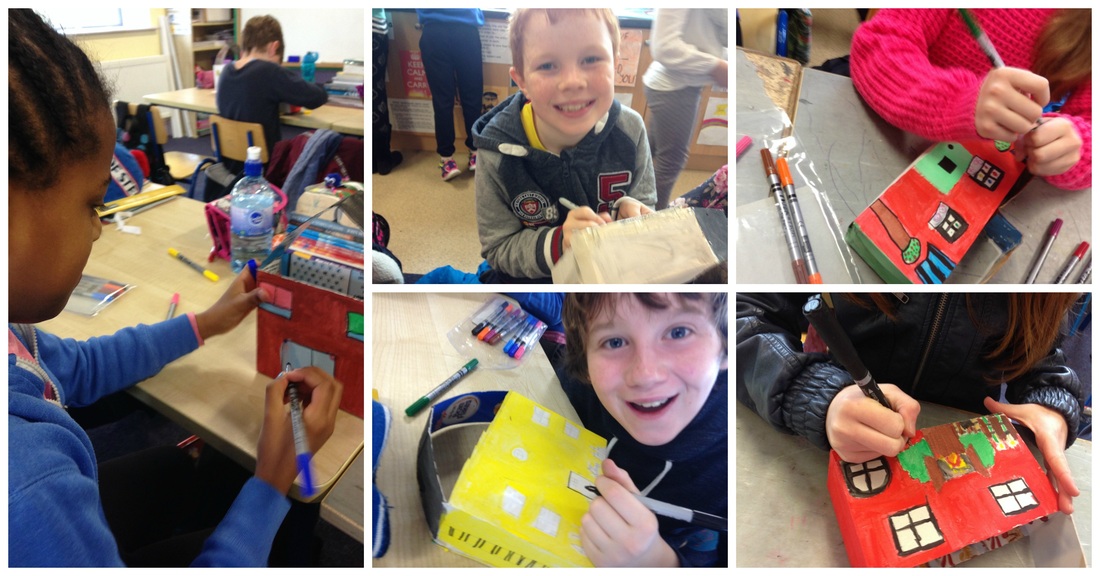
The houses in progress (above) ... and the finished product (below)!
0 Comments
As we've been recently studying World War 1 and World War Two (and our projects are almost ready for presentation!), Ms. Kirby chose art lessons that were related to our theme. First, we learned about propaganda posters, which were used to influence the public in different ways. During World Wars One and Two, propaganda posters were used on both sides in order to… - Recruit men to join the army; - Recruit women to work; - Encourage people to save food and not to waste it; - Keep spirits high; - Promote the leaders and government. Having examined some real propaganda posters, we set about making our own. They turned out very well! We also learned about the Blitz in London during WW2. We talked about the bombing that the British people in cities had to endure during the war. They had to use blackout curtains and bomb shelters, and many children were evacuated from the cities to the countryside. We created a silhouetted skyline of London using black card and layered it over a sunset. We had to use very intricate and careful cutting to create all the buildings and shapes of the skyline. Some people added planes and bombs, and we also used crepe paper and chalk pastels to create the effect of the smoke and fires caused by the bombs. These masterpieces are displayed in the main school! Why not have a look when you're passing by?
Recently in art, we created Viking longships, linking into the topic we had been recently learning about in history. There were many steps involved in creating the longships.
First, we had to create a sky using paint in vertical strokes and oil pastel for detail. We also painted an A3 sheet using various methods (sponging, scraping, spatter painting etc.) to create the sea. When dry, the sea had to be torn into wavy strips and adhered under the skyline. Then we made our longships from card, decorating them with marker, crayon and colouring pencil. We created effective dragon heads for the tops of our boats. Finally, we had to make 3D effect sails from paper and shade them with various tones to create texture. They turned out brilliantly! Why not pop in and see them if you're passing by? 'One wintry day I made a snowman,
Very round and tall, The next day when I saw him, He was not the same at all! His hat had slipped, his arms drooped down, He really looked a fright - It made me start to wonder: What do snowmen do at night?' Last week, our art was inspired by a beautiful children's book, 'Snowmen at Night' by Caralyn and Mark Beuhner. This book would definitely make a good read for children in junior and senior infants (and you can read it online here if you'd like) but we were more interested in the beautiful illustrations. We thought about what snowmen might get up to at night... Snowmen standing on their heads, sledding, skiing, having snowball fights, playing basketball or soccer, dancing, singing, weight-lifting... The suggestions were endless! We used textured blue sugar paper and chalk pastels to create our masterpieces. Everyone decided on an activity that their snowman or snowmen would be doing at night. We drew a moon in the sky and then sketched our snowmen with pastels. We worked hard on shading the side of the snowman furthest from the moon to give a 3D effect. Later, Ms. Kirby sprayed hairspray over them to 'fix' the chalk pastels. They turned out amazing! Come and see them on display in our classroom if you're passing by! This week, we studied symmetry in maths. We discussed things in the natural world that have symmetry (or near symmetry) and spoke about reflections and mirror images. We drew lines of symmetry in shapes and discovered that the number of sides of a regular polygon also tells us the number of lines of symmetry it has, for example, a regular hexagon has six sides, therefore it has six lines of symmetry. We also practised reflecting mirror images using grid paper and shading in the appropriate boxes with pencil.
It was an obvious choice that our art for this week would be linked to symmetry! We created symmetrical robots and characters using grid paper. First, we figured out where the vertical line of symmetry would be. Then we created our pictures step-by-step, making sure that they were symmetrical. The final step was to add colour. What do you think? Now that the cold weather is well and truly here, we’ve been getting in the spirit with some winter inspired art in the class. Recently, we had great fun creating these pictures of children catching snowflakes on their tongues! First, we sketched the person on light blue paper with a pencil. Then, we added the colour with vibrant oil pastels and outlined our drawings. The final step involved a sprinkling of glitter on the snowflakes falling around our children. I wonder if we’ll be getting any real snow this winter?!
Linked to our space project, we recently created mixed media solar system collages. The first step involved creating the Milky Way galaxy on a black background. Using watered down white paint, we spatter-painted lots of stars and constellations. It was great fun and quite messy! Then we built and decorated the eight planets that orbit the sun using lots of different materials (such as crepe paper, tin foil, felt, card, wool etc.). Finally, we assembled the solar system with the planets in order. They turned out great! What do you think?
On Friday, we had an enjoyable day after our Halloween party the night before. We deserved a break after all the hard work we've put in this term! We followed a brilliant step-by-step drawing tutorial to create a cartoon Frankenstein picture that can decorate our houses for Halloween. Everyone put a lot of work into colouring and decorating their freaky Frankensteins, as you can see above and below (some of them were not quite complete so the finishing touches had to be added at home). Why not have a look at this website for more great Halloween drawing tutorials that might keep you busy on a rainy day during the mid-term break?
In keeping with our recent space theme, we constructed space rockets in art this week. We brought in kitchen rolls and toilet rolls which formed the body of our rockets. We made the top by creating a cone shape from card, and the fins were also made using a triangle of card which slotted into the cylindrical centre. After building the rockets, we painted them using bright colours and added decoration. Now they're ready for their outer space mission! What do you think?
Recently, we have been learning about Italy in Geography and Ancient Rome in History. We read about the boot-shaped country and the islands that are close to its coast, such as Sicily and Sardinia. Some of us had been on holidays to various places in Italy, including Sorrento, Venice, Bari, Sardinia and Rome. Ms. Kirby showed us her holiday photos from Italy! We found these places on the map. We learned about the delicious Italian food and drink, and created Italian menus featuring pasta, pizza, bruschetta, lasagne, cappuccino and gelato - yum! We explored some of the things Italy is famous for, such as fashion, cars, architecture and art. We also learned about the Ancient Roman Empire. We read the story of Romulus and Remus, the legendary founders of Rome. We found out about the powerful Roman army with its clever tactics and well-trained soldiers. Did you know that a century of soldiers in Roman times only meant 80 men? We compared the life of rich Romans living in villas to poorer citizens crammed into apartment blocks. We also read about Roman entertainment, from the bloody gladiator battles in the Colosseum to the relaxing public baths. Having learned about Roman mosaic art, we decided to create some mosaics of our own. We drew pictures that were representative of Italy and used 'tiles' of coloured card to fill them in. There were some amazing results, from pizza to Roman soldiers and shields, gelato and many more. What do you think? |
Ms. Kirby's 4th ClassWelcome to our blog! Have a look and see some of the things we get up to, using the categories below to help you navigate different subjects. Categories
All
Archives
June 2015
|